
Is it true?
Did you hear that the gallery wall is dead?
Me, either.
Not exactly. Just some internet grumbling. Stale. Overexposed. That sort of thing. If it is under assault, I can’t sit still for it. I will single-handedly fight to keep it alive. I could do that in the #newoldhouse, just with covering up the WPFH. We’re like the Louvre on Marion, we’ve got so many galleries. And y’all know there’s gonna be a gallery of sorts in The Office - that magical space that time forgot, though I don’t suppose you’ll believe that ‘til you see it.
Check Pinterest and you’ll know for sure that the gallery wall is alive even if, in some cases, we might wish otherwise. I don’t think that’s because the concept is stale or overexposed, as much as it is overwrought. It’s a case of taking a classic method for displaying art and making it uber trendy. Now it’s like the word uber…you can’t spit without hitting somebody who’s saying ‘uber’ while demonstrating how to make a gallery wall.
People did as people do, they got carried away and started hanging all sorts of crazy ish on walls - without regard to scale, proportion or context. Start with context. If you just want to fill a wall with stuff because all the cool kids are doing it, you’ll probably end up with a less than artful installation. You have to give thought to the why, then the what and the where and the how.
Case in point: a gallery wall I did for a client a while back. There are lots of styles for gallery walls, I chose this project because it’s a super-easy-paint-by-numbers example. Also, I had some pictures of the process. It was completed over five years ago, and I think it holds up pretty well over time.
Here’s my step by step process:
1) Find a client. Be your own client, if you must. In this case, I had a wonderful client I’d worked with previously and bonus - she had a room in dire need of intervention.

2) Be the wall, Danny. Be the wall. The client didn’t plan to stay in the house long term, so the plan was mostly cosmetic – make it happily livable, and set the stage for potential buyers a few years hence. I gave her a detailed design plan to implement (undoing some unfortunate design choices, upgrading lighting, replacing counters and cabinet hardware, painting, and so on). When the messy stuff was out of the way, I scaled the wall.

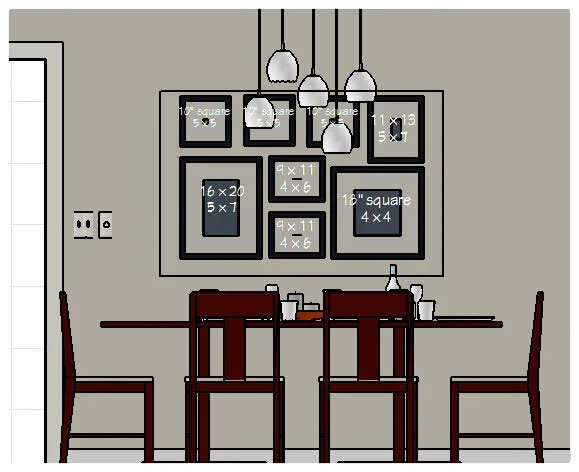
3) Spend a fair amount of time considering what to do with your new blank canvas. If you’re staging to sell, you might pick up something large scale and colorful at Pier 1 or HomeGoods. For a more personal statement, you could format and apply a meaningful quote with vinyl lettering. Or ding ding ding: gallery wall! As it happened, while the work was being done on the shell of my client’s kitchen, I was experimenting with kitchen photography. I suggested a gallery wall, using some of those photographs, framing them with Wood Gallery Frames from Pottery Barn. These are my Go To: nice quality, inexpensive (as compared to custom framing), readily available in multiple sizes and finishes, with free shipping. Can’t beat a classic. It’s also super easy to change the mood of the room by swapping out photos or whatever you’re displaying – art, fabric swatches – you’re limited only by your imagination. (Note: uniform frames are called for in this application - where consistency and alignment are part of the overall aesthetic. You can mix and match if you’re going free form.) I mocked up a couple of gallery plans on the computer, but…

4) …if you’re trying this at home, your first pass should be making an arrangement in some open floor space. Use a white sheet or drop cloth to provide a neutral background for your art pieces. This will give you a better sense of what works together, both for color and scale.
5) In this space, having made the decision for precision, I mapped the area the collection would cover, arranging and aligning within a defined space, keying it with frame and photo sizes. You have some wiggle room in a free form gallery, but when you go with a tightly aligned arrangement, precision is key. The center or focal point of your collection (or a single piece of art) should generally be at eye level. In a dining space, because you’ll mostly be sitting to view, adjust it a bit lower. Keep in mind that ‘eye level’ in art gallery-ese, is 57” from the floor.
6) Make patterns. What? Make Patterns. Do not skip the patterns. I’m talking to you. If your wall surface is out of the ordinary, like a brick wall, you have to be extra diligent with arrangement: make sure hanging points fall within mortar joints. Or cross your fingers and hope brick clips will work with your bricks. We’ll be testing brick clips in the Lab next week.

7) Stand back and admire your work.
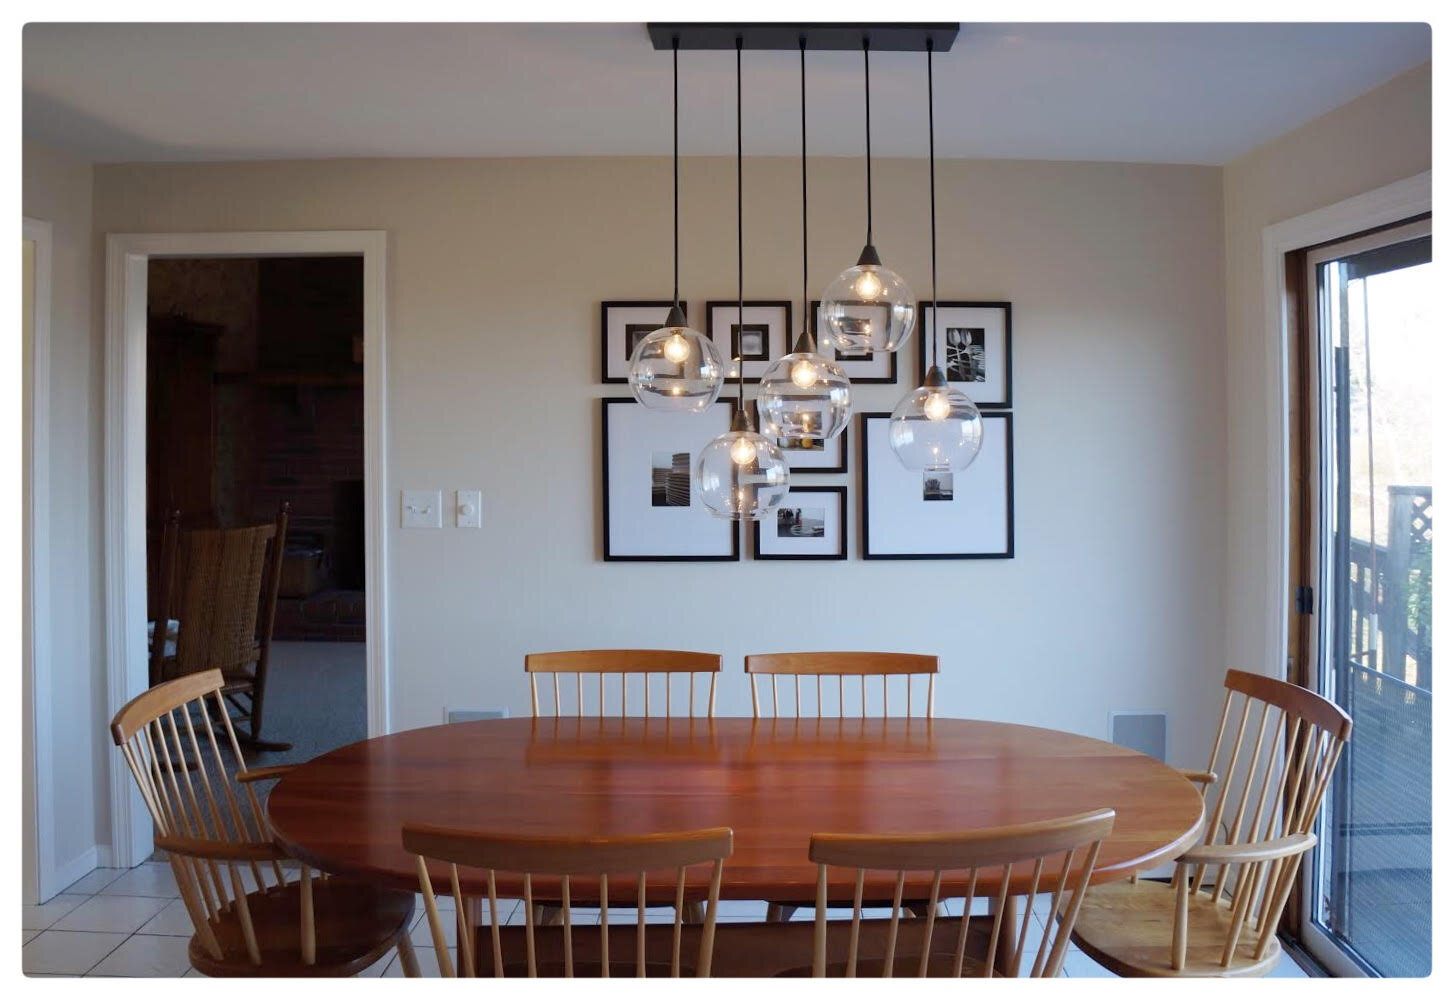
Whether you need to fill a vast expanse on a less than vast budget or you have a treasured collection you want to display, thoughtful curation and ruthless editing are the way to achieve a gallery wall worthy of the name.
Yes sir, as long as this girl is in the business of rearranging other people’s stuff, gallery walls gonna survive the haters.
Vive le gallery wall!
